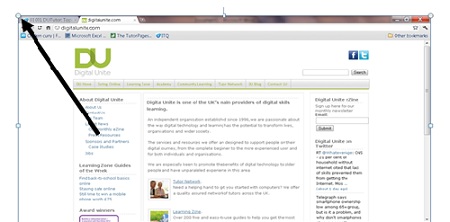
Friday, May 3, 2019

A1- How to use ICT Tools


Use of specific ICT tools in education

A Knowledge Map on Information & Communication Technologies in Education

Guiding Questions:

What is known about which ICTs are most useful to benefit education? What do we know about the usefulness, appropriateness, and efficacy of specific ICTs (including radio television, handheld devices, computers, networked computers and the Internet) for educational purposes? What do we know about the use of open source and free software in education?

Note to reader: infoDev – a program of the World Bank – promotes innovation and entrepreneurship in smart agriculturedigital technology, and climate change technology. Through business programs and early stage financing, we help developing countries in the Caribbean, Africa, and Asia go green and develop solutions to local problems.

In the past, infoDev worked with ICT and education. While our programs do support some entrepreneurs and start-ups that develop educational technologies (like Afroes and ListenMi), ICT and education are no longer the focus of our mission.

Current knowledgebase
 What we know, what we believe -- and what we don’t

General

The Internet is not widely available in most LDCs; radio and TV are 
Broadcast technologies such as radio and television have a much greater penetration than the Internet throughout much of the developing world, and the substantial gap is not expected to be closed soon.


Radio and TV can have high start-up costs, and reinforce existing pedagogical styles
Educational initiatives that utilize radio and television typically have quite high initial start-up/capital costs, but once they are up and running, on-going maintenance and upgrade costs are much lower (making initiatives utilizing radio and TV for distance learning in the education sector particularly appealing for donor support in many cases). One-to-many broadcast technologies like radio and television (as well as satellite distribution of electronic content) are seen as less ‘revolutionary’ ICTs in education, as their usage is seen as reinforcing of traditional instructor-centric learning models, unlike computers, which many see as important tools in fostering more learner-centric instructional models.


Radio instruction has been used widely and is reasonably well studied
Radio instruction in formal education has been well studied, especially the links between the use of radio in combination with school-based educational resources and a variety of pedagogical practices.


TV has been used with success in a few places
Television has been utilized successfully as a mechanism for reaching out-of-school youth in a number of countries, especially in Latin America and China, and the results of such projects have been widely disseminated.


In some cases, where markets have been liberalized, ICTs are used to distribute educational content regionally within a country 
Market liberalization has in many countries allowed for the development of locally- (as opposed to centrally-) controlled distribution channels that utilize ICTs (like radio and the Internet, and to a lesser extent television) to create and broadcast educational content more targeted to the needs of specific communities, and as a result have a greater flexibility to employ local languages.


CAI is not highly regarded by experts and in OECD countries, but still, receives much interest in LDCs
The usefulness of computer-aided instruction (CAI), in which computers are seen as simple replacements for teachers, has been largely discredited, although there appears to still be great interest in CAI in many LDCs where computers are being introduced.


It is unclear where to place computers to make sure they are used most efficiently
There is very little research on the most appropriate placement of computers in schools, or in the community, used to achieve various learning objectives.


Multi-channel learning is a useful concept 
The emerging practice of ‘multi-channel learning’, which focuses on enriching the educational experience by engaging all resources that are available to help effect incremental change by coordinating the various ways to connect learners with information, knowledge, and stimulation, and to mediate those interactions, provides valuable insight into how blended learning approaches can be delivered and tailored in areas of great resource scarcity.


Satellite is much hyped but under-studied
While satellite broadcasting of electronic educational resources is thought to hold much promise, there are few case studies of successful implementation of satellite broadcasting to small LDCs.


New Internet technologies hold promise but are not yet operational
Emerging Internet technologies, especially recent and emerging wireless protocols (including 802.11, and shortly WiMax), are thought to hold much promise for providing connectivity to remote areas, but projects utilizing such technologies are for the most part in pilot or planning stages, and face many regulatory hurdles.


Mobile Internet centers (vans, etc.) are being deployed as a way to reach rural areas
A number of educational initiatives utilizing mobile Internet centers have been piloted in the past decade, but little cost and impact data has emerged from such projects.


Community telecentres are a hot topic, but successful, replicable models have not yet emerged
Community telecentres (sometimes based in schools) have be touted as important tools to provide access to learners (including teachers engaged in personal enrichment and professional development opportunities) to ICTs outside of formal school settings.


The use of handheld devices is just now receiving serious widespread attention
Little research has been done on uses of handheld devices (including personal digital assistants and mobile phones) in education.


‘Free software’ holds promise, but costs and impact are still not well documented
The uses of ‘free’ software is widely touted as a cost-effective alternative to the uses of proprietary software (especially Microsoft products), but research in this area is largely advocatory in nature.


Comments

General comments

We know that technology changes – rapidly – and newer, more cost-effective and more powerful technologies will continue to emerge of potential use in education. At the same time, evidence shows that, once installed in schools, ICTs continue to be used for the life of the functioning life of the technology, whether or not newer, more cost-effective and powerful technologies emerge (especially as upgrade paths are seldom part of initial planning).


Much of the publicly available information about the effectiveness of particular ICT tools is generated by the companies who market such products and related services.


Applicability to LDC/EFA context

While it is clear that it is the application of various ICTs that are the most important determinants of the effectiveness of such tools in education, the choices of tools are quite varied and each has its own advantages and disadvantages. Policymakers and donor staff are often bombarded by information and studies from vendors on the suitability of their products or services, and there is a need for further, independent research on the appropriateness on specific tools with potential to help meet education-related MDGs.


Some areas for further investigation and research

What models exist for the effective utilization of ICTs to support on-going professional development for educators? What are the best practices for mainstreaming pilot projects involving interactive radio instruction (IRI) at the Ministry of Education, and how are such projects managed and maintained over time? Where should computers reside if they are to have the greatest learning impact in education? Is the use of ICTs as in-class presentation mechanisms a cost-effective use of technology? How have/can handheld devices (including SMS-enabled mobile phones) be used to support education (especially related to the professional development of teachers and school administration), and what are the emerging best practices? How can existing community and interactive radio networks outside the education sector be used to benefit education? What successful models exist for opening ICT facilities in schools to the wider community? Does the use of so-called "open source software" offer compelling benefits in education? What models exist on effective public-private-community partnerships in education for ICT equipment provision and maintenance?

Some Recommended Resources
to learn more ….

African Tertiary Institutions Connectivity Study (Draft Report) [Steiner 2004]


Applying New Technologies and Cost-Effective Delivery Systems in Basic Education. World Education Forum Education For All 2000 Assessment [Perraton 2001]


Free Open Source Software - A General Introduction [Wong 2004]


Interactive Radio Instruction: Twenty-three Years of Improving Educational Quality [Bosch 1997]


Integrating ICTs into Education: Lessons Learned [UNESCO-Bangkok 2004]


Learning With Handhelds: Findings From Classroom Research [Vahey 2003]


Open Source as Appropriate Technology for Global Education [Carmichael 2004]


Schoolnet Toolkit [UNESCO-Bangkok 2004]


The Use of Information and Communications Technology (ICT) in Learning and Distance Education [Intelecon Research 2000]


Excerpted from infoDev's Knowledge Maps: ICTs in Education -- What do we know about the effective uses of information and communication technologies in education in developing countries?

Suggested citation:
Trucano, Michael.  2005. Knowledge Maps: ICTs in Education.  Washington, DC: infoDev / World Bank.

More resources

Use of specific ICT tools in education(URL)

More stories like this

Evolution of an mLab: Innovating and Iterating to Help South African Entrepreneurs

In 2011, there were virtually no technology-focused start-up incubators or... Read More

Caribbean Transit Solutions: Paving the Way for a More Efficient Caribbean Transportation System

The public transportation market in the Caribbean is in urgent need of modernization,... Read More

Investors Take Notice as Start-Up Sendy Disrupts Last-Mile Logistics in Kenya

Since its launch in 2015, Sendy has quickly grown into one of Africa’s top start-ups... Read More

SIGN UP FOR OUR NEWSLETTER:


Who We Are

About infoDev


What We Do

Agribusiness Entrepreneurship


Climate Technology


Digital Entrepreneurship


Early Stage Financing


Women's Entrepreneurship


Entrepreneurship Program for Innovation in the Caribbean


Knowledge

Publications


Training Guides


Innovation Policy Platform


Impact

Annual Report


Featured Entrepreneurs


News

Media Coverage


Press Releases


Videos

Videos


Work with Us

Job Opportunities


Request for Expressions of Interest

A2- How to browse the internet

Browsing the Internet: An introduction


What do l need to know?


browser is a program on your computer that enables you to search ("surf") and retrieve information on the WorldWideWeb (WWW), which is part of the Internet.  The Web is simply a large number of computers linked together in a global network, that can be accessed using an address (URL, Uniform Resource Locator, e.g. http://www.veths.no for the Oslo Veterinary School), in the same way that you can phone anyone in the world given their telephone number. 
   URLs are often long and therefore easy to type incorrectly.   They all begin with http://, and many (but not all) begin withhttp://www.  In many cases the first part (http://, or even http://www.) can be omitted, and you will still be able to access the page.   Try this with http://www.cnn.com
  URLs are constructed in a standard fashion.   This may be of use to you.   Take, for example, the address of this page:


http://oslovet.veths.no/teaching/internet/basics.html

The ".no" indicates that the server is in Norway.  The page you have accessed is called basics.html, and it resides in a folder on the server called "internet", which is in the folder called "teaching".   If the URL that you type does not work, and you have typed it correctly (no mistakes are allowed!), the reason may be that the host has renamed the web page, or moved it to another folder on the server, or you are not allowed access to that level. 
Try removing the text of the URL stepwise from the right-hand end in this example, until you reach the main page:


http://www.bbc.co.uk/info/purpose/public_purposes/index.shtml.

It is possible, in many cases, to find your way back down through the hierarchy to the page you were interested in.


  You don't need to know how the telephone network functions to be able to make a phone call.   However, you ought to know how to use your telephone apparatus and the finesses (software) it contains.  Your computer is the equivalent of the telephone, and a browser is the equivalent of the software that modern telephones contain.   (A browser can also be used to handle electronic mail, create and edit information on the Internet, as l have done here, and to contact discussion groups.   This presentation is limited to the use of browsers to surf the WorldWideWeb). 


 Searching the Web


If you don't know the telephone number of the person you wish to ring to, you need a telephone directory.   The Web provides two methods of searching for pages providing information: 
    • sites presenting web pages sorted by category and subcategories, e.g. Yahoo (several sites, including http://www.yahoo.com and http://www.yahoo.no
    • sites offering search engines that return lists of web pages containing text that matches a search word or string, e.g. Google (http://www.google.com), AltaVista (http://www.altavista.com) and FAST Search (http://www.alltheweb.com).

Many web sites offer both, or a combination of, these alternatives.


Before you conduct a search, it is important to consider, among others, the following points:


1. Is your choice of search term is adequate, too restrictive or too general? 
2. Is the search you have planned to undertake most suited for a search engine that categorizes web sites, so that you can browse through appropriate subcategories when the first results are returned? 
3. Are you more interested in using a search engine that merely returns all the web pages it has found containing the search term? 
4. Have you read the Search Help pages that most search pages offer?   These will tell you how the search engine conducts the search, and therefore how you ought to plan your search. 
5. Bear in mind the fact that engines differ in their coverage of the Internet, their speed and whether they are largely compiled manually by people or automatically by 'robots' that scan the Internet.


A search strategy must include knowledge of how the search engine you have planned to use handles Boolean Logic and other similar search terms, e.g.


• transgenic AND mice will find all pages covering transgenic mice, but not pages that only mention transgenic rats 
• transgenic NOT mice will return pages on all species other than mice. 
• "transgenic mice" will find pages that contain the phrase "transgenic mice", i.e. where the words are adjacent in the text, but will not return a page containing the text "transgenic rodents, including mice", for which transgenic NEAR mice would be necessary 
• transgen* will return occurences of trangenesis, transgenic and transgenic (thereby increasing your chances of finding pages you are interested in), but will also return pages featuring the word 'transgender', which is probably not what you were looking for!


N.B. Not all search engines support all these options, some support many more, and all of them have a "default" function (e.g. AND or OR) which you must check before you start. 


To illustrate the enormous implications that this may have for your search results, try out the following search strings in the AltaVista or Google search engines and note the number of web pages returned for each alternative:


• Karina Smith 
• "Karina Smith" 
• Karina and Smith 
• KARINA and SMITH 
• Karin* Smith 
• Karin*Smith 


Excellent reviews of these processes have been written by information specialist Krys Bottrill. These cover:


Some websites about the Internet in general and animals in particular


These include:


The author of these two sites, veterinarian Ken Boschert, has published a book containing summaries of the most important links on these pages: "Mosby's Guide to the Internet".


While you are on the Internet, you can donate free food to the starving:http://www.thehungersite.com


A3- Preparation of teaching materials


How to Make Teaching Aids


Nina Makofsky

Teaching aids add dimension to your instruction. Children learn best when they are actively involved in the educational process, and teaching aids provide this opportunity. The problem is that teaching aids are expensive and easily lost or broken. Instead, make some simple teaching aids that will engage your students.

Teaching Aids to the Rescue

Plan your organization of the teaching aids. Teaching aids are useless if they are dumped into a giant bin and difficult to retrieve. Instead, use shoe boxes, yogurt containers, tin cans or baskets for sorting, displaying, passing around and storing teaching aids. You and your students can decorate the storage containers with colored paper, labels, stickers or pictures of the objects to be contained within.

Select which areas of the curriculum most require teaching aids. Typically, English as a Second Language curriculum benefits from realia while math and science curriculum demands counters and other manipulatives.

Related Articles

Preschool Bulletin Board Ideas for Spring

Art Projects That Teach 3D Shapes

Moon & Stars Lessons for Kindergarten

How to Make Firemen Hats for Preschool Kids

Create a symbolic meaning for the teaching aids you create. For example, if you are using water bottle tops as counters for math, you can organize them with circle-shaped labels. Yellow tops can have a value of one, red a value of ten, and so on. Provide a chart or a key for the symbolic meaning of the teaching aids.

Involve the students. Teaching aids are more meaningful to students and their learning if they have the opportunity to create them. If you are teaching the letter "P", for example, students can use popcorn to make the letter which you then display on a bulletin board for future reference. If you are teaching kids to count by ten, they can use sentence strip paper to make skip counting charts to place on their desks.

Allow students to explore with the teaching aids. If you have dry beans for counting or weighing, set up the scales as a learning center and have the students make discoveries on their own about the possibilities and properties of the teaching aids. Students can then report back to classmates or draw up or write about their findings.

Tips

Rotate and update teaching aids to keep them fresh and interesting, as well as relevant to the current curriculum. Some of the most fun teaching aids are edible. Use gummy bears for measuring or counting, or host a fractions party where all snacks must be divided equally amongst table groups.


Warnings

Some teaching aids--such as wiggly rubber bugs--are too tempting as playthings. It is best to keep them out of reach until they are needed.


Things Needed

Small everyday objects


Storage containers


References

The Effective Use of Teaching and Learning Aids 


About the Author

Nina Makofsky has been a professional writer for more than 20 years. She specializes in art, pop culture, education, travel and theater. She currently serves as a Mexican correspondent for "Aishti Magazine," covering everything from folk art to urban trends. She holds a Bachelor of Arts in English from Mills College.

Methodology


Terms of Use


Privacy Policy


Copyright Policy


Contact Us


About Us


Accessibility Statement


AdChoices 


Copyright 2019 Leaf Group Ltd. / Leaf Group Education

A4- Preparation of Power point


Create a presentation


Select option:

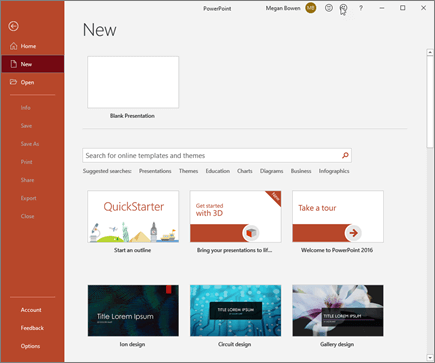
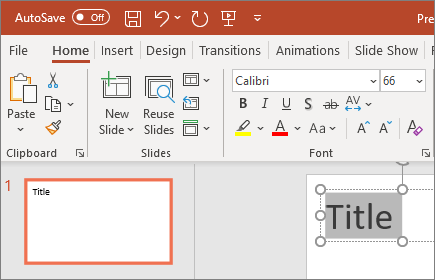
Select Blank Presentation to create a presentation from scratch.


Select one of the templates.


Select Take a Tour, and then select Create, to see tips for using PowerPoint.


Add and format text

Place the cursor where you want, and type.


Select the text, and then select an option on the Home tab: FontFont sizeBoldItalicUnderline, ...


To create bulleted or numbered lists, select the text, and then select Bullets or Numbering.


Add a picture, shape, or chart

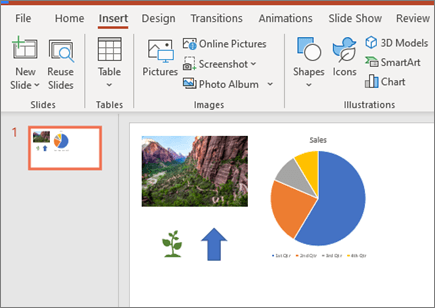
Select Insert.


To add a picture:

Select Picture.


Browse for the picture you want and select Insert.


To add a shape, art, or chart:

Select ShapesSmartArt, or Chart.


Select the one you want.


Get support

CONTACT US

Expand your Office skills

EXPLORE TRAINING

Was this information helpful?


Yes No

What's new

NEW Surface Pro 6


NEW Surface Laptop 2


NEW Surface Go


Xbox One X


Xbox One S


VR & mixed reality


Windows 10 apps


Office apps


Microsoft Store

Account profile


Download Center


Microsoft Store support


Returns


Order tracking


Store locations


Buy online, pick up in store


Education

Microsoft in education


Office for students


Office 365 for schools


Deals for students & parents


Microsoft Azure in education


Enterprise

Microsoft Azure


Microsoft Industry


Data platform


Find a solution provider


Microsoft partner resources


Microsoft AppSource


Health


Financial services


Developer

Microsoft Visual Studio


Windows Dev Center


Developer Network


TechNet


Microsoft developer program


Channel 9


Office Dev Center


Microsoft Garage


Company

Careers


About Microsoft


Company news


Privacy at Microsoft


Investors


Diversity and inclusion


Accessibility


Security


English (United States)

Contact Us


Privacy & Cookies


Terms of use & sale


Trademarks


Office accessibility


Legal


© Microsoft 2019


A5- Interactive White board


How To: Use an Interactive Whiteboard

By Jeffrey Branzburg 


 Interactive whiteboards are desirable peripherals these days. When hooked up to a computer, the whiteboard's screen becomes a "live" computer desktop, which can be tapped to pull down menus, highlight, and move or open files. Users can also circle relevant sections on the projected image, draw geometric figures, and underline. Then they can save the screen — complete with annotations — which can then be e-mailed, made available on a shared server, or printed out.

Most interactive whiteboards connect to computers via USB cables, but some recent models communicate wirelessly using Bluetooth technology. Many interactive whiteboards need LCD projectors in order to project a computer image onto the screen, but some models have an integrated projector behind the screen. These models are more convenient and have fewer wires but are much more expensive.

Wondering how to use an interactive whiteboard in the classroom? Consider these ideas.

Presentations and Projects. Students can present multimedia projects with the whiteboard, controlling the entire presentation without touching a computer keyboard.

Web Streaming and Video. Teachers can show streamed or downloaded video clips using programs like Windows Media Player and QuickTime. Clips embedded into multimedia presentation programs can easily be shown as well. The interactive features of the whiteboard allow users to pause, circle, annotate, highlight, and more. Of course, a DVD or VHS player can be connected to the projector, too.

Printing and Saving Notes. Interactive whiteboards let users print or save anything they've written. Teachers can put notes in a file on a shared server for students to download or post notes on a Web page or blog. Notes can also be printed out and distributed, allowing students to participate in the presentation instead of simply copying from the board.

Encouraging Critical Thinking. Interactive whiteboards encourage critical thinking. Imagine using the whiteboard with concept-mapping software like Inspiration or Kidspiration, for example. Students' ideas could be written directly on the whiteboard; if the teachers switches to outline view, the class can brainstorm together in an organized fashion.

For Students with Special Needs.Interactive whiteboards may be beneficial to students with special educational needs. The large fonts and bright colors might be helpful for both visually impaired students and those who have trouble staying on task, while students who respond well to kinesthetic learning will benefit from touching the board.

Jeffrey Branzburg is a contributing editor and regular columnist for Technology & Learning.

Interactive Whiteboard Terms

Blog. An online journal of periodic articles (posts), usually presented in reverse chronological order, with one or many contributors.

Bluetooth. A way to connect and exchange information between devices like PDAs, mobile phones, laptops, PCs, printers, and digital cameras via a secure, low-cost, globally available short-range radio frequency.

Whiteboard. Whiteboards operate analogously to blackboards — they allow markings that can easily be removed to temporarily adhere to the surface of the board.

Interactive Whiteboard. A dry-erase whiteboard writing surface that can capture writing electronically. Interactive whiteboards require a computer. Some interactive whiteboards also allow interaction with a projected computer image.

Many of these definitions were culled from www.wikipedia.org.

RECENT NEWS

Tech & Learning is part of Future plc, an international media group and leading digital publisher. Visit our corporate site.

Terms and conditions


Privacy policy


Cookies policy


Advertise


About us


Contact us


Update Consent


© Future Publishing Limited Quay House, The Ambury, Bath BA1 1UA. All rights reserved. England and Wales company registration number 2008885.

A6- Using of visualizer/digital camera


How to Take a Picture with a Digital Camera

Co-authored by Rosalind Lutsky

A digital camera is a fun investment. You can use a digital camera to take pictures of people, places, and scenery. If you're new to a digital camera, how to best use the device can be confusing. To start, figure out the basics of how your camera works and take a few pictures. From there, adjust your settings for best quality. Follow some basic tips and tricks to make your photos stand out.

Method One of Three:
Taking a Picture


1

Turn the camera on. The first step to using a digital camera is simply turning the device on. Most cameras have a small on button located somewhere on the side of the camera. If you don't see your camera's on button, read your manufacturer's instructions. They should explain how to find the on button.

Most digital cameras have to charge. If your camera's battery is dead, it will not turn on. Don't panic if your camera is not turning on. Usually, a charger comes with the camera. The charger plugs into the wall and then into your camera. In the event your camera does not turn on, try plugging it into the charger, waiting a few minutes, and then trying again.


2

Insert a memory card. Most digital cameras only have enough storage to hold a few pictures on their own. You'll need to insert a memory card into your camera so it can hold a large amount of photos. You can buy a memory card at most electronic stores or supermarkets.

The most common type of memory card is the Secure Digital (SD) memory card. These are compatible with the vast majority of digital cameras. A Secure Digital 'Xtra Capacity (SDXD) memory card holds more pictures than the SD, but may not be compatible with older digital cameras. xD memory cards are also compatible with the majority of digital cameras, as are Multi Media Cards (MMC).[1]


Other types of memory cards, like xD Picture Memory Cards and Memory Stick Duo Memory Cards, are only compatible with certain types of cameras. Your camera's user manual should say which memory cards are compatible with your camera. The packaging of a memory card should also indicate which cameras are compatible with that card.


3

Familiarize yourself with the buttons.Digital cameras come with a variety of buttons. You should spend some time familiarizing yourself with what these buttons do. Some buttons help you zoom in and take pictures. Others allow you to adjust settings on your camera.

The shutter button is a small button, usually on the top right corner of the camera, you press down when taking a picture. The zoom button is usually a long line, which you toggle back and forth to zoom in and out on a subject. These are the basic buttons you need to take a picture.[2]


The "mode" button is usually a rectangular button labeled "mode." You press down on this button to switch from picture mode to video mode, in the event you want to shoot videos. A rectangular button labeled "menu" allows you to switch the settings on your camera. You usually navigate through the menu mode with the hep of a scroll wheel you rotate to select and adjust settings.[3]


A triangle-shaped button, much like the play button on your VCR, allows you to playback pictures you just took. You can scroll through pictures using the scroll wheel.[4]


4

Take a few pictures. If you want to start using your camera, begin by taking a few pictures. Choose a subject, like a landscape or a pet, focus your camera for a moment, and then press the shutter button. The camera should capture this image. To get the hang of using your digital camera, take a few pictures around your house.

EXPERT ADVICE

Rosalind Lutsky, photographer, adds: “Until you familiarize yourself with the manual settings, start by setting your camera to auto mode. Press down halfway on the shutter button to focus the camera; then press down all the way to take the picture."


5

View your pictures. Once you've taken a few practice pictures, review your pictures. Press down on the play button. The pictures you just took should appear on your camera's screen. You can scroll through the pictures using the scroll wheel.

As these are just practice pictures, you may want to delete them. You can usually select an image on screen using the scroll wheel, shaped something like a trash can, to delete unwanted pictures.


6

Transfer your photos to your computer. Once you've taken enough photos, you can upload your photos onto your computer. The process is usually fairly self-explanatory and depends on the type of camera you have. If you're confused, refer to your instruction manual.

You would plug your camera into your computer using a USB cord or a similar device. From there, something should comes up saying something along the lines of "Get photos" or "Download pictures." You would click that button and the pictures should upload smoothly.[5]


You should delete the photos off your camera once they're on your computer. This will free up space for more photos.[6]


EXPERT ADVICE

Rosalind Lutsky, photographer, adds: “On some computers — many older Macs, for example — you can insert your SD card directly into the SD port on the computer to transfer your photos."

Advertisement


Method Two of Three:
Adjusting the Settings

1

Decide between auto or manual focus.The first thing you should do when adjusting your camera's settings is make a decision between auto or manual focus. In auto focus, your camera will focus in on pictures on its own. When using manual focus, you will have to focus the camera yourself.

In auto focus, the camera will choose a spot on frame and focus on that just before you take the picture. In manual focus, you are able to choose an area of focus on your camera's lens. You usually do so using the scroll wheel.[7]


If you're new to photography, you should go with auto focus for the most part. There are few shots where manual focus will benefit you. If you get into photography on a professional level, you may want to consider manual focus down the road. For casual photography, however, auto focus should be sufficient.[8]


2

Pick your shutter speed. Shutter speed is how quickly the camera's shutter moves, effectively allowing you to choose how fast you want to take a picture. A higher shutter speed will allow you to freeze action in a shot. To capture moving water in detail, for example, pick a higher shutter speed. A lower shutter speed will blur action. If you want a hazy photograph of a waterfall, pick a low shudder speed.[9]

If you're shooting at a low shutter speed, shaking your camera could result in blurry photos. It takes awhile to get a steady hold on a camera when taking pictures. Therefore, it may be a good idea to see if your camera has a shake-free shutter speed option. If it does, set your camera to the shake-free option when operating at a lower shutter speed. This will help your pictures come out crisper.[10]


3

Choose your aperture. Aperture refers to the opening of a camera lens, which is formed by a set of blades. Adjusting the aperture settings allows the blades to open more or close more, letting more light into your shot.[11]

The aperture setting you want depends on the type of picture you're taking. For portraits, faces, and other close-up photos, select an aperture between F1.4 and F5.6.[12]


For landscapes, an aperture between F11 and F22 should work well. For the sharpest possible landscape photos, you can go as high as F23.[13]


For any other pictures, stick to an aperture between F8 and F11.[14]


4

Do not adjust the ISO speed. A camera's ISO speed is the speed at which a camera picks up light. A higher ISO speed results in brighter photos, but pictures may become grainy if your ISO speed is too high. For the most part, you will not need to create brighter photos. Leave the ISO speed alone until you're a more experiences photographer.[15]


5

Decide on a picture quality. The default file setting for pictures in most digital cameras is JPEG. JPEG photos are easily shareable. However, as JPEG files are compressed, some information is lost when photos are uploaded. If you want to avoid having your photos compressed, consider switching to RAW picture quality. This setting does not compress or tamper with the pictures when you upload them onto your computer or other device.[16]

Advertisement


Method Three of Three:
Improving Photo Quality

1

Use the rule of thirds. The rule of thirds is concept of photography that says you should divide every photo you shoot into nine parts. Imagine a grid on your photo with two equally spaced vertical lines and two equally spaced horizontal lines, slicing your photo into nine even sections.[17]

Important elements of the picture should lie on one of the lines or the intersection of lines. In theory, this creates a tension in your photo that makes it appear more interesting.[18]


For example, if you're shooting a sunset, position the horizon line in the intersection between a horizontal and vertical line. This should create a more interesting photo than simply shooting the sunset in the middle of the camera frame.[19]


2

Angle up to shoot buildings. When shooting buildings, it's recommended you angle the shot up. This will create a fun, triangular appearance for the building. Stand on the ground in front of the building and angle your camera upward, pointing to the building's apex.[20]


3

Take shots of people from a downward angle. If you're shooting people, especially small children, it can be fun to take shots from a downward angle. Full body shots may be slightly easier to capture with a downward angle. You can also lie or kneel on the floor to get down to your subject's level.[21]


4

Avoid flash in most cases. You do not need to use flash for the most part. A camera's flash often needlessly brightens pictures, especially pictures of people. People's faces often look unnaturally bright when flash is on, even if you're shooting at night. For the most part, turn off the flash setting on your camera.

You can usually turn flash off in your camera's settings. Oftentimes, a lightning bolt-shaped icon indicates flash is on. You usually select a lightening bolt with a cross going over it to turn off flash.


In some cases, flash may be helpful. If you're taking pictures very late at night, it can help to use flash to highlight people's faces.


5

Practice. Photography is like any other craft. It takes practice to get better. Spend a lot of time experimenting with your camera. Adjust the settings and take pictures of many different subjects. Eventually, your pictures will start looking more professional.

Advertisement

Community Q&A

Question

After taking the shots, how do I go about editing them using an HD camera?

Community Answer

The best thing to do would be to upload them to a computer first. (There will probably be a cord that came with the camera which can be used to attach the camera to the computer.) You can then edit them using an app like VSCO or Mextures. These apps are usually on phones, but could probably be found on an iMac or Apple computer -- if not, similar apps will be available. The apps are really simple, giving you the ability to change your exposure, shadows, highlights, and other things as well. Photoshop is another program that you can use to edit with, but it can be pricey.


Question

Can the camera print the pictures?

Community Answer

It can if it's a polaroid-based digital camera. They usually have to have paper put into the base to be able to print the pictures. Most digital cameras have a USB that you can plug into your computer where you can edit and print your pictures from the files page, or you can use a photo editor such as Photoshop and print from there.


Question

How do I take a picture of myself?

Community Answer

Turn the camera around. On some digital cameras there will be a screen to show you how your picture will look.


Question

What is a shutterstock?

Community Answer

It is a company that has stock photos, video, music, etc. Basically you can use them as part of your video, assuming it falls within the scope of a royalty free.


Question

What does the battery look like?

Community Answer

That depends on which camera you use. Some use AAs, others use AAAs, and some use lithium ion batteries which can differ from each camera.


Question

How do I transfer pictures from a Sony camera to a computer?

Community Answer

The camera should have come with a transfer cord; if you can't find that, remove the SD card and slide it into your computer's SD card slot.


Related wikiHows

How to

Buy a Digital Camera

How to

Choose a Camera

How to

Change a Digital Picture from Color to Black and White

How to

Transfer Images from a Digital Camera to a Computer

How to

Resize Digital Photos

How to

Avoid Noise in Your Digital Photography

How to

Find Digital Pictures on Your Computer

How to

Adjust Your Digital Camera's White Balance

How to

Create a Photo Booth with the Raspberry Pi

How to

Take a Digital Photo

How to

Geotag Pictures

How to

Improve Your Photography with Manual Focus

How to

Use a Photoshop Subscription on Multiple Computers

How to

Make Money From Digital Photography

Co-Authored By:

Rosalind Lutsky

Photographer

This article was co-authored by Rosalind Lutsky, a trusted member of wikiHow's community. Rosalind Lutsky has been pursuing photography as a hobby 2010. She has been commissioned to take portraits, worked as a concert photographer, and done work with film photography and development, but is most enthusiastic about her work with nature photography.

Co-authors: 23

Updated: March 29, 2019

Views: 123,817

Article Rating: 78% - 27 votes

Categories: Digital Photography

References

http://www.whatdigitalcamera.com/buying-advice/understanding-memory-cards-9083


http://www.gcflearnfree.org/digitalphotography/2


http://www.gcflearnfree.org/digitalphotography/2


http://www.gcflearnfree.org/digitalphotography/2


http://www.dummies.com/how-to/content/how-to-transfer-photos-from-your-digital-camera-to-computer.html


http://www.dummies.com/how-to/content/how-to-transfer-photos-from-your-digital-camera-to-computer.html


http://www.digital-photo-secrets.com/tip/482/the-idiots-guide-to-camera-settings/


http://www.digital-photo-secrets.com/tip/482/the-idiots-guide-to-camera-settings/


http://www.digital-photo-secrets.com/tip/482/the-idiots-guide-to-camera-settings/


More References

Reader Success Stories

HH 

Hana Hasfa

Mar 23, 2017

"I found information."


Did this article help you?


Yes

No


A7- Snapshots Preparation


How to take a screenshot

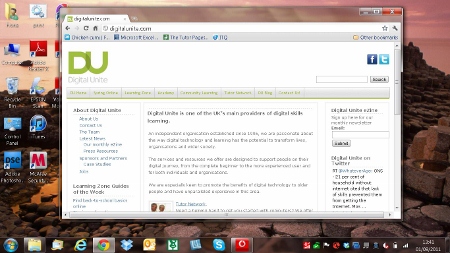
A screenshot (also sometimes called a ‘screen grab’, ‘screen dump’ or ‘capture’) is a bit like taking a photograph of whatever is currently on your screen, which could be a website, a window or just the desktop. The image can then be pasted into a word-processed document. 

This guide is for Word 2010 but any similar program can be used.

You’ll need:

a computer with Microsoft Word installed.


Follow these step-by-step instructions to take a screenshot and place it in a Word document

Step 1: Unless you’re taking a screenshot of just your desktop, make sure that the window you want to include in your screenshot is open.

Step 2: Press the ‘Print screen’ key: Prt Sc or PrtScn. This is usually on the top row of the keyboard. When you press this, you’ll be taking a screenshot of the desktop. On some laptop keyboards, if the Prt Sc text is on the top line of a button, you will need to press and hold the Shift key and then press Prt Sc.

Step 3: Immediately open a new Word document and click the ‘Paste’ icon, or hold down Ctrl on the keyboard and press V.  Your screenshot will now appear as an image in your document.

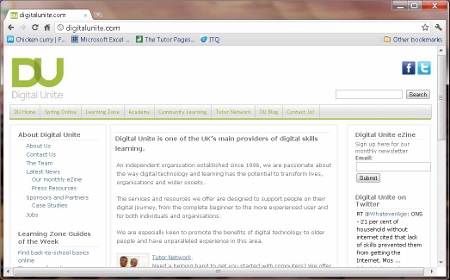
Step 4: You can also take a screenshot of just the active window. To do this, hold down Altwhile you press Prt Sc or PrtScn.

Step 5: You can resize your screenshot. Click on it and a frame will appear around the outside with small ‘handles’ on the corners and sides. You can change the size of the image by dragging on one or more of these handles with your mouse, making sure that the left mouse button is pressed down.

Step 6: Your screenshot can be treated the same as any other inserted image. When you click on it, two new ‘picture tools’ tabs will appear in the ‘ribbon’. These give you a number of formatting options, such as cropping and special effects.

Fiona Syrett is a Digital Unite tutor.


Next steps

How to copy and paste text

How to print a document

How to save a document

10 top tips for computer beginners

Search Guides

Search

Most read guides

What is Dropbox?

What is Twitter?

What is an iPod?

See more guides »

Newest guides

Best... health and wellbeing podcasts

Top ten apps for mental health and wellbeing

How to use StreetLink to help get homeless people off the street

See more guides »

Free how-to guides for your website

Why not add our award-winning and extensive range of digital skills guides to your website?

Find out more

Start a Digital Champion movement!

Could your workplace do with developing its digital skills? With funded membership opportunities currently available, now is the perfect time for organisations to join our Digital Champions Network.

Find out more

Subscribe to our newsletter

Join our mailing list to receive the latest news, offers and expert insights from our team.

Technology guidesFree guides for your website

About us


Get in touch


Privacy policy


Terms of use


Follow us online:

Tweets by digitalunite

Copyright 2018 Digital Unite

We use cookies on this site to enhance your user experience


By clicking any link on this page you are giving your consent for us to set cookies.

 More info

OK, I agree No, thanks

A8- Prepare Videos


How to Create a Good Video

Author Info

Have you ever tried to make a home video with your camera but it just didn't turn out the way you wanted it to? This article will show you how to make good videos that you may share with the world!

Steps


1

Find a good camera. An 8 megapixel phone camera or better will get the job done well.


2

Pick a good location. Find a place find a place with good lighting. Somewhere outside, a room with lots of windows, or a room with good lights. Avoid dark rooms or rooms with a single light source.

Advertisement


3

Get a good angle. You should probably place the camera at or above shoulder height. If you are filming a stationary video, a good shot typically has the character's shoulders near the middle and their waist or knees at the bottom. ALWAYS do a short test video before recording the content. If you want to get fancy add multiple cameras each recording from different sides.


4

Speak clearly. If you’re speaking about a subject know what your talking about. If its an actual speech create a script with bullet points. Practice recording to get the hang of being loud and not stuttering. Unless you’re a gifted speaker you’re going to mess up.


5

Be alive! Act like you’re talking to someone. Don’t read of your script, just hit the main points. Don't stare at the camera, or any individual object. Even if you stay facing the camera, shift your weight, use limited hand gestures, speak with more than monotone, and use your face to reinforce your words. If possible add jokes, even if they are corny.

Advertisement


6

Transfer for editing. If it is on a phone, upload it to YouTube. You will need a Google or Gmail account to upload, but it is easy (and free) to sign up. You can make the videos private or public if you want to keep it to yourself or share. If your phone/camera isn't able to, then copy it to your computer and edit it.


7

Edit on YouTube. This works best on Google Chrome (browser). Google search “youtube editor”, login, and then you can choose any videos you’ve uploaded. You can learn how to edit from this feature at How to Use YouTube's Video Editor


8

Make short clips. Unless there is unbroken dialogue, or a scene that must be all one piece, chop it up. Change your shot every 1-10 seconds. This may sound extreme but is very important. Use this to cut out any errors or content-lacking spots in your video.


9

Use simple transitions. Do not use flipping, rotating, spinning, shattering, melting, zooming, or otherwise obnoxious animations. While they may look cool they will not make your video look cool. The best transitions to use are fading to black (on YouTube choose color fade -> black) or no transitions (also called a hard transition). Also other ones that can be used are; fading to white, cross blur, cross fade, and wipe.


10

Add effects and filters. Judge if your video needs to be brighter or dimmer, rotated, stabilized, or have muted audio for certain clips. If so these options can all be done on the YouTube editor.


11

Publish your video! You can choose if everyone can see it, or if only people with a link can see it, or if only you can see it. If you want a copy of your video, choose the “unlisted” option and then use one of the many YouTube downloaders to get in on your computer.

Advertisement


Community Q&A

Question

Can I use a computer?

Community Answer

Yes, of course! You may want to install a program like iMovie to use.


Question

How to make a good video using iPhone 4 camera?

Hydra StarDuck

Community Answer

Try using iMovie and wait a couple of seconds for the camera to settle before you start filming. Also, try to get a stand. Try to zoom in as little as possible when you're filming your video because when you zoom in the pixels get bigger making the quality a lot worse.


Question

What is the best Canon camera that is not very expensive?

Community Answer

That depends on what you want your camera to be able to do, but I would go with a Canon 600 or 700D for starters.


Question

Is Viva Video a good video editor?

Akshayaka Veeraraghavan

Community Answer

It depends on your need. If you want professional editing and effects, use a professional editor. If you can do well with Viva Video, use that.


Question

How can I make videos if I'm ugly?

Community Answer

You don't need to be attractive to make videos. But if you're particularly sensitive about the way you look, don't read the comments on your videos.


Question

What is a good stand to use for filming using my phone?

Community Answer

A selfie stick is a good idea especially if you are making a personal movie or a vlog.


Question

I don't have a special camera, so how can I make my video look really good without it?

Community Answer

Even without a good camera, you can make a great video. One way is to make the video "about" being cheaply made, like the Blair Witch Project or the experimental films of Kuchar. If you aren't going for the D.I.Y. aesthetic, one way to make a cheap camera still look good is to focus on keeping the camera level, using a tripod or other flat surface. As far as editing goes, there are some great movies that don't have any edits at all, like Warhol's Vinyl or Snow's Wavelength. That said, you'll probably want to edit. Check out free or low-cost editing programs online.


Question

How do I make it look professional?

Community Answer

Move the camera from left to right, although don't make it too shaky. You can also watch movies and see how, and also making the scripts nice and looking like a character would say in a movie.


Question

What if I use a Canon 80d?

Community Answer

The Canon 80d will do an excellent job for your video!


Question

What are good categories that people like to watch?

Community Answer

Action, romance, documents, comedies, drama, fantasy, realistic fiction, and apocalyptic are all really popular genres right now.


Video

Tips

Pick an interesting topic! No one wants to see the grass grow.


If you want more specific ideas to what you are filming watch Youtube content that looks how you want your video to look, then pay attention to how they film their videos.


Get straight to the point! Never ramble on about random things.


Edit your video down to only what it needs to have in it. The videos people do not watch are the ones where it is all one shot and they see the person turn on and turn off the camcorder or phone. So please edit it down to only what the video needs to survive.


Storyboard or sketch your ideas down to get a better picture of how your video is going to turn out.


Make sure there is good lighting. Film in a room with many windows or outside when it's sunny.


Advertisement


Warnings

If you do not save your video, it will be lost in cyberspace forever!


You may get rude or obnoxious messages if you post your video on a video-sharing website.


If you do not check the pronunciation of words and especially names, it is embarrassing every time the video is played.


Advertisement


Things You'll Need

A Camera/phone with video software


A script


A computer (If you want to edit your video)


A tripod (optional)


Related wikiHows

How to

Create a Storyboard

How to

Make a Funny Video

Advertisement


About This Article

wikiHow is a “wiki,” similar to Wikipedia, which means that many of our articles are co-written by multiple authors. To create this article, 41 people, some anonymous, worked to edit and improve it over time. This article has also been viewed 131,694 times.

Co-authors: 41

Updated: February 7, 2019

Views: 131,694

Article Rating: 77% - 246 votes

Categories: Comedy Movie Making | Home Movie Making

Did this article help you?


Yes

No

Advertisement


A9- Video Conferencing class


Types of Video Conferencing Technology

Share to FacebookShare to TwitterShare to LinkedInShare to PinterestShare to More

There are many different types of video conferencing technology. As a crucial means of communication, these innovations are highly attractive to many end users and organizations. They promote live and visual connections between two or more people who are in two separate locations. Video conferencing technology has changed communication as we know it. These new technologies include:


1. Desktop Video Conferencing

This video conferencing technology is commonly used by many organizations. Desktop conferencing has been engineered to accommodate the industry's requirements for video conferencing technology. It provides H.323 voice, video and application sharing.

Desktop video conferencing also comes with easy installation features, add-in boards, and bulky hardware. Known as the most affordable conferencing technology, it is convenient for many users. Those who do not have a desktop can also hold a video conference via a laptop. This kind of flexibility makes this technology highly preferable for many people. Both desktops and laptops have inbuilt microphones and speakers, which facilitate better communication. The option is very popular with people on-the-go and typical office workers.

2. Integrated Video Conferencing

Integrated systems represents a new video conferencing technology that is often used in classrooms or conference rooms that have different participants. It comprises of a centralized location wiring, routed processors, the main camera and other peripheral video sources. These configurations are equipped with multiple video conferencing features.

3. Monitor Codec

This is one of the best types of video conferencing technology because it offers the least disruptive solution for conferencing systems on demand. It comes with a double-duty hardware that saves time by converting your computer to video call display when needed and reverting it back to the monitor when the video call has ended.

4. Codec

This type of video conferencing technology uses an external display, camera, and microphone. It is a better—suited option for those who like to walk around while on call because the codec allows for the freedom to do this. However, the Codec must be at both the source and the destination of a communications link. In order for a video conferencing to be successful, the two participants must negotiate their video and audio codecs at the beginning of the connection. The most common Codec video conferencing applications are H.264, H.261 and H.263+.

5. Room-based Technology

If multiple people want to communicate through video conferencing then room technology is exactly what they need. However, with the system, the following considerations should always be made:

a) How many sites will be on a video call?

b) How many locations will initiate a call?

c) How many displays will be used?

This technology has a powerful room-based video conferencing system that will let users host high-quality calls in an effortless manner.

6. Telepresence Video Conferencing

Telepresence video conferencing refers to a series of technologies that allows those in communication to feel as if they were present or physically talking to each other. This is the closest representation of a lifelike meeting as all participants are making eye contact with each other and can interact on a personal level.

7. Multiway Technology

Multiway is a true representation of new video conferencing technology. This is especially beneficial for businesses that have been established in different locations and wish to include several video collaborative meetings. Due to the fact that more than one video conferencing system in call, multiway capabilities are needed. Many manufacturers offer 4-way multiway technology solutions. However, it is important to look for flexibility and go with manufacturers who also offer 6-way and 8-way capabilities. This technology accommodates many people in different business locations in order to maximize productivity.

8. Data-sharing

This video conferencing technology is ideal when it comes to giving presentations during the video conference. It comes with data-sharing and high interaction capabilities. It allows for:

a) Uploading of videos for quick sharing during video conferences.

b) Sharing of documents, spreadsheets and recorded live sessions in real-time.

c) Scaling of shared video clips to an ideal size.

Data-sharing video conferencing technology not only allows people to talk from remote locations but also share important data and information. 

Conclusion

Video conferencing comes with many tangible benefits for businesses and individuals. These different types of video conferencing technology have paved way for more efficient meetings and a stronger sense of community among business contacts. On a personal level, they have facilitated a face-to-face connection that allows the participants to develop a new sense of familiarity with individuals who are far away from them or those they have never met in person.


Subscribe Now

Get our latest article updates as soon as they are posted!


Posted on May 03, 2017

Tags:

Video Conference

Check Out Related Articles

Top 5 Video Webinar Platforms in the...


Tips for Running a Successful Video ...


What Is Telepresence Technology?


The Best Alternative to Logitech Vid...


Top 10 best alternatives to Lync con...


What Is Remote Training and How Does...


Top 8 Ways to Enhance Virtual Team W...


5 Best Internet Communication Tools


Hot Articles That You Like

Best 7 GoToMeeting Alternatives in 2018

Read More

Top 5 Best Free Group Video Conferencing Software 2018

Read More

5 Best Free Video Conferencing Services to Challenge Skype

Read More

6 Best Free Webinar Services to Host Webinars Easily

Read More

Best 5 Free Webinar Platforms 2018

Read More

6 High-Quality Free Webinar Software for Startups 2018

Read More

 >Resource >Video Conference>Types of Video Conferencing Technology

Download

Windows App


Mac App


iPhone App


iPad App


Android App


Outlook Plugin for Windows


ezTalks Rooms for Windows


Products & Solutions

Video Meetings


Online Webinar


Conference Rooms


Executive Room


Huddle Room


Small Room


Middle Room


Large Room


Sales

1.844.663.7276


Contact Sales


Plans & Pricing


Request a Demo


On-Premise Solutions


Support

FAQ


Support Center


Feedback


Resource


Company

About Us


Press


Partners


Contact Us


Contact

Have Questions?


Call:1.844.663.7276


©2019 ezTalks | Sitemap | Terms |Privacy | Cookie | GDPR